How to Achieve a Mirror Finish on CNC Aluminum Parts
Aluminum alloys are widely favored in the field of CNC machining due to their lightweight nature and high strength. However, CNC-machined aluminum parts often suffer from issues such as uneven surfaces, visible tool marks, and even localized defects. These issues not only compromise the aesthetic appeal of the product but may also lead to assembly errors. This article will delve into the root causes of these problems and propose a systematic set of solutions. To achieve a smooth, high-quality surface finish on aluminum parts, it is often necessary to identify the underlying causes through Repetitive experimentation.
The following measures can be implemented to address these issues:
1. Optimize Your Spindle Speed and Feed Rate
2. Always Use Climb Milling for Aluminum
3. Maximize Rigidity: Tool and Fixture Setup
4. Ensure Efficient Chip Evacuation 5. Polishing – Where the Real Mirror Finish Happens
1. Optimize Your Spindle Speed and Feed Rate
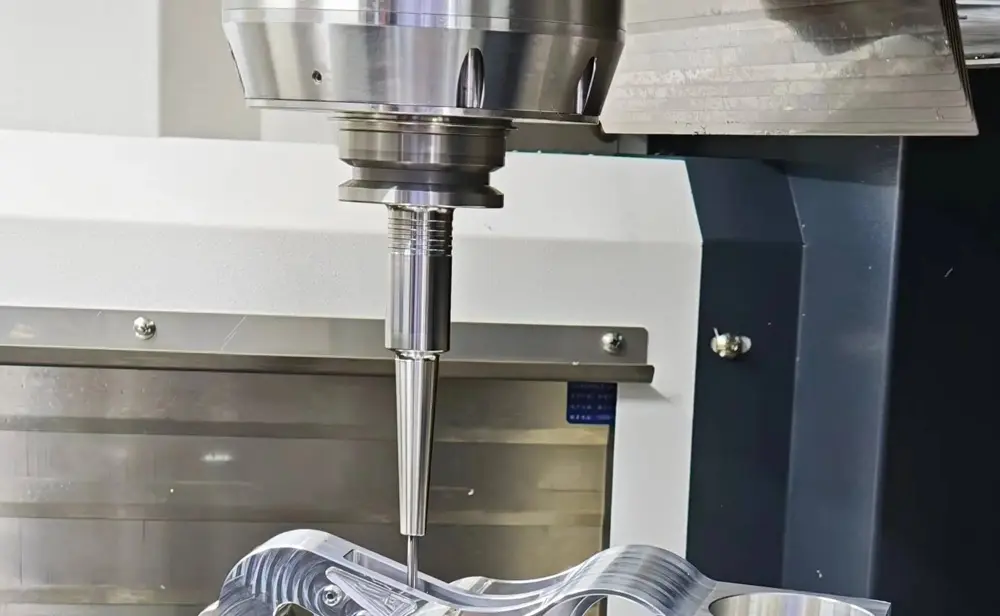
Spindle speed and feed rate are the most direct and controllable factors determining whether a part’s surface finish is mirror-like and smooth, or rough and sandpaper-like. They function much like a car’s accelerator and brakes: when coordinated effectively, the ride is smooth and fluid; when poorly coordinated, it becomes bumpy and jarring.
- Spindle Speed (S-value): Determines the number of times the cutting edge of the tool sweeps across the workpiece surface per unit of time.
- Feed Rate (F-value): Determines the depth of cut and the speed at which the tool advances into the workpiece per unit of time.
Many people assume that higher spindle speeds automatically result in a smoother surface finish; however, this is not the case. The impact of spindle speed on surface finish follows a U-shaped curve. For most aluminum machining applications, a range of 18,000 to 30,000 RPM represents a “sweet spot” for spindle speed. Speeds that are either too low or too high will result in a rougher surface finish; when operating a CNC machine, these values can be fine-tuned within this range based on factors such as tool diameter, tool coating, and machine rigidity.
Regarding the feed rate, it is essential to find a proper balance. If the feed rate is too high, the “peaks” and “valleys” left behind by the tool on the surface will be more pronounced. This results in very distinct, regular feed marks visible on the surface. Conversely, if the feed rate is reduced below a certain threshold (for instance, to a value smaller than a specific proportion of the tool-tip radius), the tool tip will begin to rub and compress the workpiece surface rather than cutting it cleanly. This leads to plastic deformation and work hardening, thereby degrading the surface quality and potentially causing the formation of “scale-like burrs.”
Let’s consider an example from the workshop operations at Lex Hardware: Using 6061 aluminum alloy as our raw material, we conducted a series of finishing operations. Through systematic parameter adjustments, we identified a specific combination of cutting parameters capable of consistently achieving a high-quality surface finish (targeting an Ra value of ≤ 0.3 µm). Furthermore, we validated the practical effectiveness of a “high-speed, low-feed” machining strategy under the specific climatic conditions prevalent in the Xiamen region.
2. Test Conditions
- Machine Tool: 3-axis vertical machining center (maximum spindle speed: 24,000 RPM)
- Workpiece Material: 6061-T6 aluminum alloy; dimensions: 100 mm × 100 mm × 20 mm
- Cutting Tool: 10 mm diameter, 3-flute carbide end mill (45° helix angle, AlTiN coating)
- Cooling Method: Emulsion coolant, external application, flow rate: 15 L/min
- Measurement Equipment: Handheld surface roughness tester (accuracy: ±0.01 µm)
- Fixed cutting depth: 0.3 mm
- Ambient temperature (Xiamen): 26°C

4.1 Group 1: Fixed Feed Rate, Variable Spindle Speed
In this test, the feed rate was held constant at 1,200 mm/min. The spindle speed was progressively increased—from 12,000 RPM, 18,000 RPM, and 20,000 RPM, up to 22,000 RPM—and the corresponding changes in surface roughness values were recorded. During the test, as the spindle speed gradually increased from 12,000 RPM to 20,000 RPM, the surface roughness (Ra) decreased from 0.82 µm to 0.22 µm. However, when the spindle speed was raised to 22,000 RPM, the Ra value rose back up to 0.28 µm. The results indicate that the lowest Ra value—representing the optimal outcome of this experiment—was achieved when the spindle speed was 20,000 RPM and the feed per tooth was 0.020 mm/tooth.
Group 2: Fixed Spindle Speed, Variable Feed Rate
We fixed the spindle speed at S = 20,000 RPM and progressively increased the feed rate from 600 mm/min to 2,400 mm/min. As the feed rate reached 1,200 mm/min, the surface roughness (Ra) value decreased from 0.41 µm to 0.22 µm; however, once the feed rate exceeded 1,200 mm/min, the surface roughness began to increase. At a feed rate of 1800 mm/min, the Ra value rose to 0.38 µm. When the feed rate reached 2400 mm/min, the Ra value deteriorated to 0.67 µm; the cutting sound shifted to a dull thud, and the surface quality was severely compromised.
So, how can these two parameters be coordinated to achieve optimal surface finishes in CNC machining? This can be determined using the following formula:
Feed Rate (F) = Spindle Speed (S) × Number of Flutes (Z) × Feed per Tooth (fz)
By combining this formula with our target feed-per-tooth value, we can precisely calculate the required feed rate.
- Finishing Strategy: Employ a “High Speed + Low Feed” combination. The target feed per tooth (fz) is set between 0.02 and 0.05 mm/tooth. This ensures that each cutting edge removes only an extremely thin chip, thereby leaving a mirror-like finish on the workpiece surface.
- Roughing Strategy: Employ a “Medium-to-High Speed + Medium-to-High Feed” combination. The target feed per tooth (fz) is set between 0.08 and 0.15 mm/tooth, aiming to maximize the material removal rate while preventing tool damage caused by excessive load.
You can also determine whether CNC machining parameters require adjustment by observing the following indicators:
- Listen to the Cutting Sound: If you hear a smooth, continuous “hissing” sound, it indicates that the cutting conditions are optimal. Conversely, if you hear a harsh “screeching” or a dull “thudding” sound, it signals that an anomaly may be occurring during the machining process.
- Observe Chip Morphology: Ideal chips should be uniform in shape, curled, and possess a silvery, lustrous appearance. If the chips appear powdery, blue, or black, it indicates that excessive heat is being generated in the cutting zone.
Iterative Testing and Fine-Tuning: Begin by performing a test cut on a piece of scrap material. Subsequently, adjust either the spindle speed or the feed rate—increasing or decreasing it by 10% (i.e., ±10%)—and carefully observe how the surface finish of the workpiece changes.
In a nutshell: If you want a smooth surface finish on aluminum parts, just remember—”high spindle speed, low feed rate, calculate the feed per tooth precisely, and keep listening to the sound and observing the chips to make frequent adjustments.”
3. Increase fixture rigidity and/or reduce the tool length.
In CNC machining, the portion of a cutting tool that extends beyond the tool holder is referred to as the “overhang.” The longer the tool overhang, the lower its rigidity. A reduction in rigidity can cause the tool to deflect or “wobble” during machining; even a deflection of just 0.01 mm can leave visible ripple marks on the surface of the finished part. Generally speaking, the tool’s overhang length should ideally not exceed four times its diameter. For instance, if you are using a 10 mm cutter, its extension should not exceed 40 mm. If you absolutely must machine deep features, consider purchasing specialized “short-neck” cutters or vibration-dampening “variable-helix” cutters. Therefore, it is essential to select an appropriate tool length—or switch tools entirely—based on the specific depth requirements of the machining operation.

3. Ensure the Workpiece is Clamped Securely—It Must Not “Move”
A fixture is a device used to secure a workpiece in place. If the workpiece is not clamped tightly, or if the clamping method is incorrect, the part will “shift” or vibrate during the cutting process. When the workpiece shifts, the resulting machined surface will inevitably be distorted and uneven. The solution is to maximize the contact area between the workpiece and the fixture whenever possible. When clamping thin-walled parts, consider using dovetail fixtures or vacuum chucks to ensure that the clamping force is distributed evenly across the entire surface. If using a vise, the clamping depth (the portion of the workpiece held within the vise jaws) should ideally be at least 50% greater than the intended cutting depth.
How can you verify that the workpiece is securely clamped? While the machine is running, place a dial indicator against the workpiece; if the indicator needle fluctuates, it signifies that the workpiece is not clamped tightly enough.
4.Ensure efficient chip evacuation to prevent the formation of built-up edges.
Aluminum machining places extremely high demands on chip evacuation and cooling. Inadequate chip evacuation allows hard aluminum chips to become entrapped between the cutting tool and the workpiece; acting much like sandpaper, these chips drag across the previously machined surface, gouging it with scratches of varying depths. Furthermore, if the cutting fluid concentration is insufficient, the flow rate is too low, or the nozzle is improperly positioned, heat generated during cutting cannot be effectively dissipated. This leads to localized overheating, causing the aluminum to soften and adhere to the cutting edge, forming a “Built-Up Edge” (BUE). This hard deposit effectively takes over the cutting action from the tool edge; not only does it mar the machined surface, but it also causes severe fluctuations in cutting forces.
How to Fix It:
- Optimize Tool Selection
It is imperative to select cutting tools specifically designed for aluminum alloys. These tools typically require a large helix angle (e.g., greater than 45°) and a razor-sharp cutting edge to ensure smooth chip evacuation. For workpieces requiring high precision, the use of Diamond-Like Carbon (DLC) coated tools is recommended, as this coating effectively reduces the coefficient of friction and prevents chip adhesion. Moreover, using worn or chipped tools essentially results in “extruding”—rather than “cutting”—the aluminum, inevitably leading to a rough surface finish. Therefore, a strict tool life management system must be implemented; tools must be replaced immediately once the flank wear on the cutting edge exceeds 0.3 mm. - Use the Right Cutting Fluid
Employ a high-flow, high-pressure stream of cutting fluid—preferably a cutting oil or emulsion specifically formulated for aluminum—directed precisely at the cutting zone to ensure thorough cooling and flushing. This process not only dissipates heat to prevent thermal deformation of the workpiece but also rapidly flushes chips away from the machining area, preventing them from being re-cut or crushed by the tool, thereby preserving the surface finish.
5. Polishing – Where the Real Mirror Finish Happens
After CNC machining, we follow a “coarse to fine, step by step” process for polishing and buffing. First, we do the preparation work: we use a scraper to remove burrs from the edges and check the depth of the tool marks. Then we move to mechanical sanding. We start with P18ou sandpaper to remove the tool marks, and gradually work our way up to P1500 for ultra-fine sanding. Each time we change to a finer grit, we rotate the sanding direction by 90 degrees. We also use wet sanding to prevent the aluminum from heating up and becoming soft. After sanding to a semi-mirror finish, we switch to a buffing wheel machine with polishing compound. First, we use a hard sisal wheel with white compound to remove fine scratches. Then we use a soft cotton wheel with green compound to achieve a mirror finish, bringing the Ra value down to below 0.05 µm. Finally, we clean the part in an ultrasonic bath to remove all remaining polishing compound, and blow it dry with compressed air. Since the humidity in Quanzhou is quite high right now, we make sure to clean and apply anti-oxidation treatment on the same day to prevent the surface from tarnishing.
Conclusion
By comprehensively optimizing these four dimensions—cutting process, tool management, rigidity control, and cooling/lubrication—you can completely resolve surface unevenness issues in aluminum machining, achieving high-quality parts that are mirror-smooth and precisely within tolerance.